
Getting the Android Emulator Working with Visual Studio for Mac on an M1 Machine


We’ve got a failure to launch
Before I go into anything else here, I just want to say that I am fully delighted with my M1 Max MacBook. I had a previous generation MacBook with an i9 processor and this absolutely blows that out of the water in basically every way. It is fast, completely silent, the battery life defies logic, and it runs extremely cool. It is hard to believe what a major leap that this feels like coming from a product that, I felt, was already pretty well designed.
Not everything is perfect though. It is a relatively new CPU architecture for the platform and, while Rosetta 2 works pretty well in a lot of cases, there are still a few rough spots. One of those has been getting the Android emulator up and running with the configurations from Visual Studio for Mac. This guide below will go through the steps that I did to get everything up and running on my machine.
Visual Studio for Mac Configuration Updates
Open up Visual Studio for Mac. From within Visual Studio, go to the application menu and select the Tools > Android SDK Manager option.

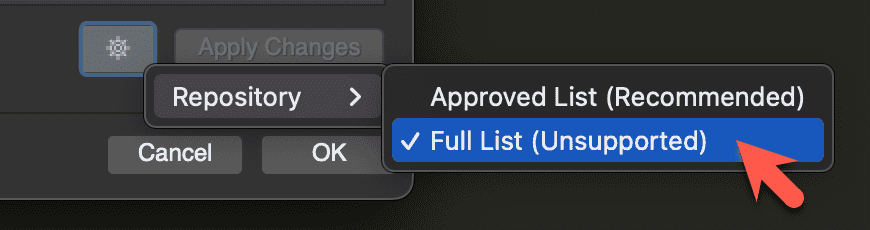
In the lower-right of the SDK Manager, select the Gear Icon > Repository > Full List (Unsupported). After you make this change it will take a bit while the repository refreshes.
Be careful here. There is a good chance you could go through here and accidentally update some components that you don’t intent, so just make sure that you very deliberately make the next steps.
What we want to do though is to add a new emulator that supports the M1 architecture. Specifically, we are looking for ARM 64 v8a System Images.
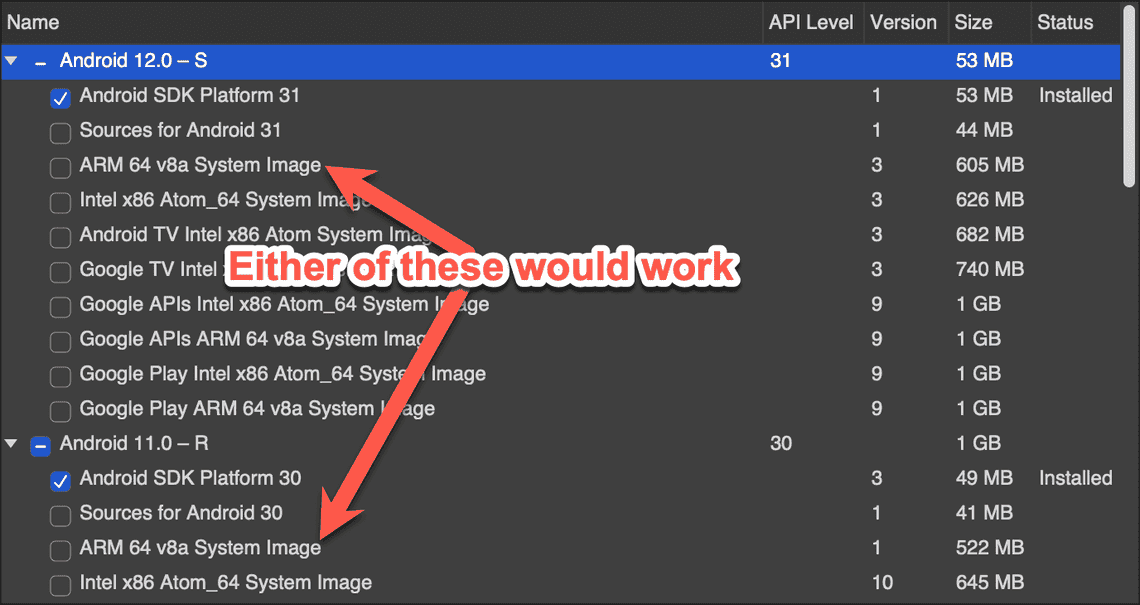
Once you have found one for the SDK you want to target, click the checkbox for the system image, then select Apply Changes, and Accept the license agreement. From there, we just need to wait for the emulator to finish installing.
Getting the Android Emulator Setup
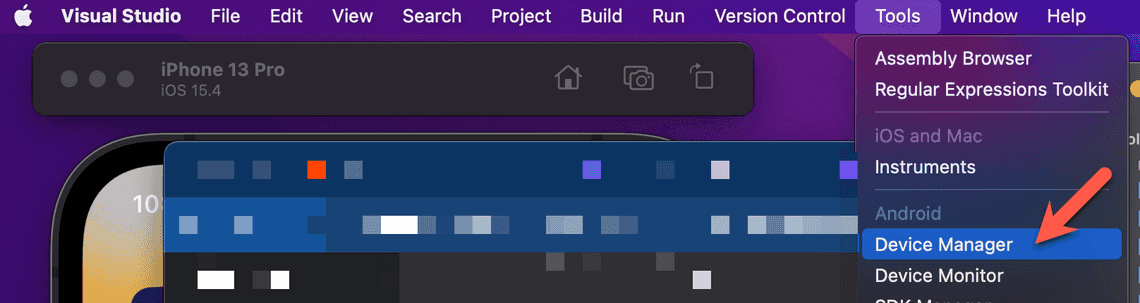
From within Visual Studio, go to the application menu and select the `Tools > Device Manager option.
With the device manager open, select + New Device. On the new device screen, you can configure the device to whatever specifications you need, but you MUST select the Processor > ARM 64-v8a option. Again, this architecture matches up with the M1 processor, so this is the specific kind of emulator that we want to create. Once you have everything configured, select the Create option.
From there, try to run the emulator. I have seen this go different ways depending on how your configuration is. Very likely though, you are going to get the error text below.
emulator: ERROR: process is translated under Rosetta. Attempting to replace emulator installation.emulator: Replacing via command: /Users/{USER}/Library/Developer/Xamarin/android-sdk-macosx/emulator/darwin-aarch64-replace.sh (downloading ~120 MB)...sh: /Users/{USER}/Library/Developer/Xamarin/android-sdk-macosx/emulator/darwin-aarch64-replace.sh: No such file or directoryemulator: Replacement done. Please relaunch the emulator. You will also need to be using an Apple Silicon-compatible system image. Check the release updates blog (https://androidstudio.googleblog.com/) for more details
Basically, there are some bits missing that are not included with the SDK install and we need to add them. The file that is missing (darwin-aarch64-replace.sh) has been removed from the main emulator repository, but at the time of this writing, it can still be found here.
What you want to do is copy all of the text of that file and create a new local file in your emulators folder. If we look at the error output from before, you can get the path where you will want to create this file. For example, /Users/{USER}/Library/Developer/Xamarin/android-sdk-macosx/emulator/darwin-aarch64-replace.sh, where {USER} is your mac username.
Additionally, we need to add the ability to execute the script. So, open up a terminal and type in chmod +x ~/Library/Developer/Xamarin/android-sdk-macosx/emulator/darwin-aarch64-replace.sh.

The last thing you need to do is go back to the Device Manager and run the emulator again. It might take two tries as it downloads and replaces a few things for you, but once it has it updated, the new emulator should fire up and you are all set!.
Wrap-Up
At this point, your emulator should be ready to use. Since the emulator runs on the same CPU architecture as the M1, performance is pretty great. No more need for HAXM or other emulator providers either. Another bonus is that this is very likely an architecture that you will be targeting for your Android app.
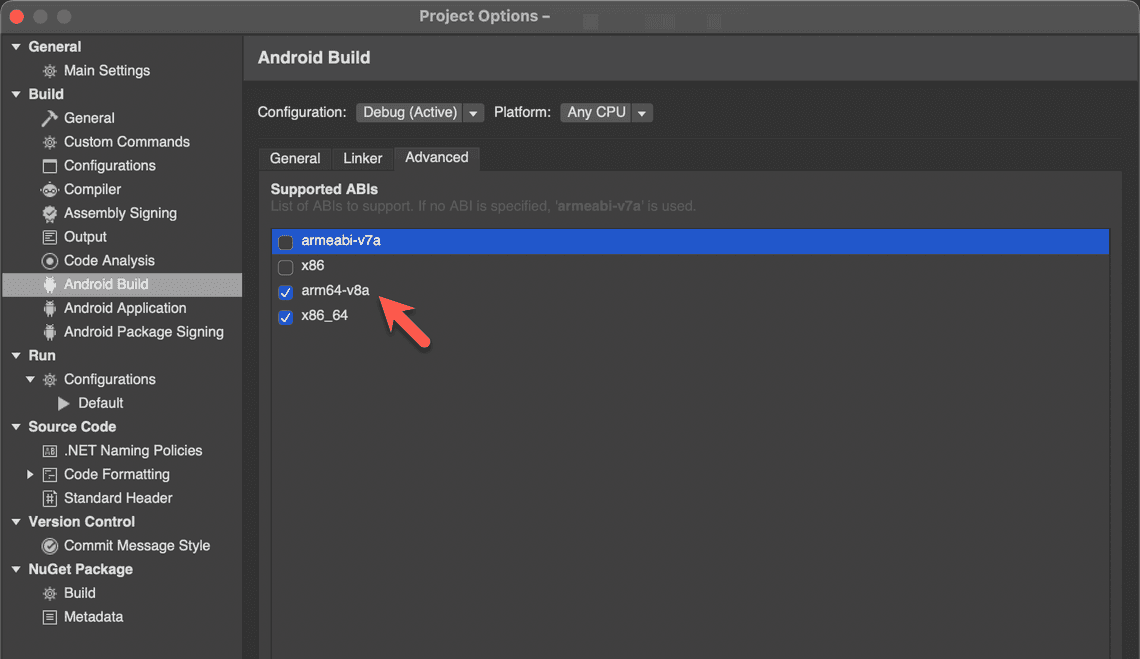
There is a chance that your Android app is not fully ready to use it though. If you get a deployment error from Visual Studio, just double-click on your Android project, then Android Build, and then the Advanced Tab. On that tab, just make sure that the arm64-v8a option is checked. Finally, select OK to save the changes. You should be good to deploy to your new emulator afterwards!
I hope this guide helped you out and if you find any changes needed or if there is a better way around this, just let me know!